【工具】前端动画解决方案Lottie(小程序/react-native篇)
Aug 1, 2019笔记前端动效lottie
前端动画解决方案Lottie(小程序/react-native篇)
上一篇记录了Lottie在web端的使用,本篇将记录其在小程序端和react-native原生应用端的使用。
虽然Lottie官方只字未提小程序这端的内容(毕竟小程序生态还未迈出国门),不过按照小程序的hybird实现原理,我们也可以利用lottie-web在小程序端以canvas形式进行动画渲染,主要借助了其配置中的rendererSettings属性。
1.小程序端的使用
小程序提供了canvas环境(其实现为原生组件),因此可以通过类似web端的实现形式在小程序端实现。但是小程序不像web可以通过DOM操作节点,在此我们借助了lottie的配置参数——rendererSettings。
2022补充:微信小程序团队也对小程序的lottie使用进行了简单封装https://github.com/wechat-miniprogram/lottie-miniprogram,原理也是底层直接使用了lottiejs库。
1.1 获取动画数据(LottieFile)
小程序自带开发工具没有打包功能,因此我们不能像web那样通过require('lottie.json')来拿动画数据。这种情况下我们可以采取以下三个方案:
- 文件放在服务端:(推荐,可缓存、修改和复用)文件放在服务端并通过wx.request方法请求;
- 改为js文件:将json文件改为js文件。在原有基础上稍作修改即可。如:
module.exports = {...}。 - 跨端工具打包:Taro、uni-app这种配置打包。
1.2wx.createCanvasContext(string canvasId, Object this)获取画布
创建 canvas 的绘图上下文 CanvasContext 对象
参数:
- string canvasId:要获取上下文的 canvas 组件 canvas-id 属性
- Object this:在自定义组件下,当前组件实例的this,表示在这个自定义组件下查找拥有 canvas-id 的 canvas ,如果省略则不在任何自定义组件内查找
返回值:
- CanvasContext
通过wx.createCanvasContext()方法我们可以拿到canvas画布。如1
2
3
4
5
6
7<!-- wxml -->
<canvas
style="width: 500px; height: 500px;"
id="lottie-canvas"
canvas-id="lottie-canvas"
class="lottie-canvas"
></canvas>
1 | // js |
1.3 rendererSettings配置
如果要使用现有canvas画布进行绘制,我们可以通过rendersettings配置传递额外的对象,如:
1 | lottie.loadAnimation({ |
由此可实现小程序端的lottie,主要代码如下:
1 | <!-- index.wxml --> |
1 | // index.js |
效果: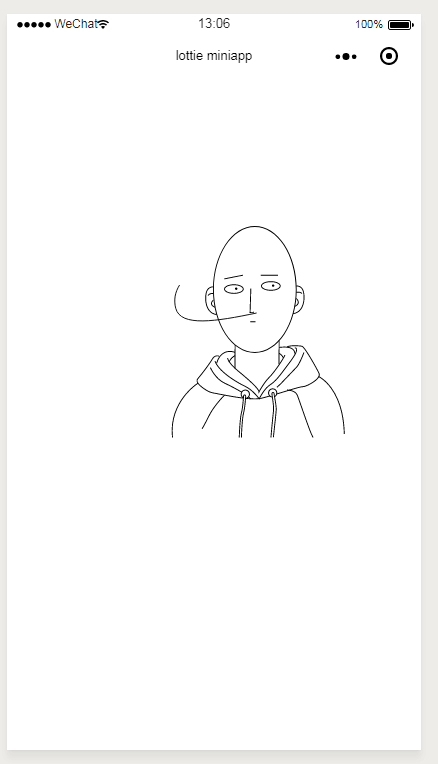
1.4 注意事项
- 1.几个lottieFile测试下来,报错和样式错位的几率很大,因此在设计阶段推荐减少动效和“满屏”图片的使用。

目前小程序的支持状况感觉并不是很好,不过相信在后续可以做到改进以达到尽可能一致的统一。
2.react-native端的使用
rn上使用lottie需要借助官网提供的插件lottie-react-native。
1.1 获取动画数据(LottieFile)
- 直接引用json:与web端打包类似,
let animationData = require('./lottie.json'); - 文件放在服务端:文件放在服务端并通过Fetch方法请求;
2.1 lottie-react-native
安装
ios为例:1
2yarn add lottie-react-native{对应版本}
yarn add lottie-ios{对应版本}
其中对应版本:
rn >= 0.59.0: lottie-react-native为latest,lottie-ios为3.0.3;rn < 0.59.0: lottie-react-native为2.5.11,lottie-ios为2.5.3;
如:1
2yarn add lottie-react-native@2.5.11
yarn add lottie-ios@2.5.3
通过react-lottie link命令链接到项目
1 | react-native link lottie-ios |
在项目目录下执行
1 | pod install |
Android可以直接通过react-native link lottie-react-native或通过修改文件进行链接,具体可见lottie-react-native android
2.2 使用
1 | import LottieView from 'lottie-react-native'; |
引入的LottieView是个组件,配置所需参数即可。
具体api可见lottie-react-native文档 api
如:1
2
3
4
5
6
7
8
9
10
11
12
13
14
15
16
17
18
19
20
21
22
23
24
25
26
27
28
29
30
31
32
33
34
35
36
37
38
39
40
41
42
43
44
45
46
47
48
49
50
51
52
53
54
55
56
57// test.ios.js
import React, {Component} from 'react'
import {
Text,
View
} from 'react-native'
import LottieView from 'lottie-react-native'
export default class test extends Component {
constructor (props) {
super(props);
this.state = {
animationData: null, // 动画数据
}
}
/**
* 获取动画数据
*/
fetchData () {
fetch('https://xxxxxx/lottie.json')
.then(res => res.json())
.then(data => {
this.setState({
animationData: data
});
})
}
componentDidMount () {
this.fetchData();
}
render () {
let {
animationData
} = this.state.animationData;
return (
<View>
<Text>Lottie test(react-native)</Text>
<View style={{ backgroundColor: '#ccc' }}>
{
animationData && <LottieView
source={animationData}
autoPlay
loop
style={{
width: 300
}}
/>
}
</View>
</View>
)
}
}
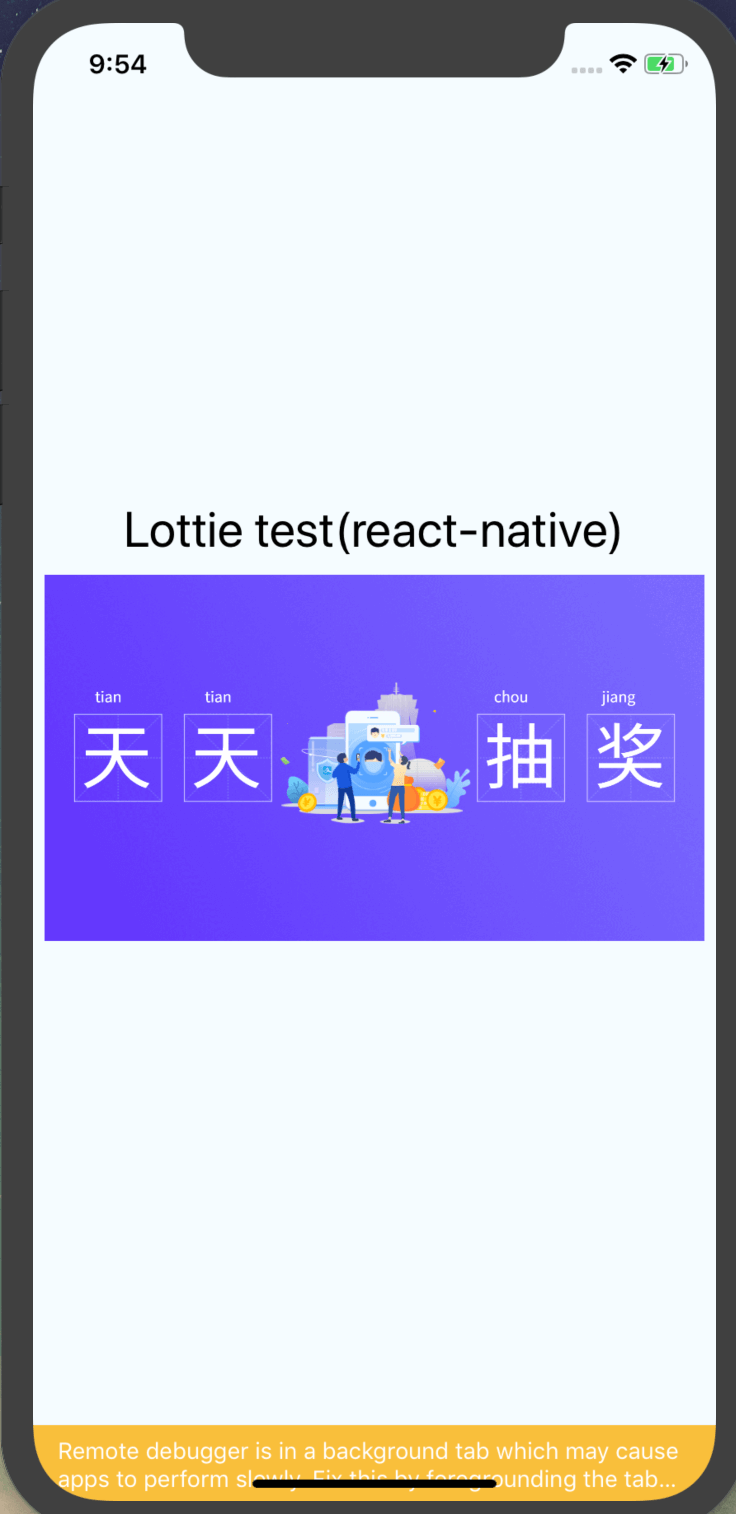
rn上效果还不错~
2.3 注意事项
- 1.需要设置组件宽度width,在本人试验的过程中width感觉是必传的。
3 在跨平台的实现原理
先占个坑~
相关链接
- https://github.com/airbnb/lottie-ios
- https://github.com/airbnb/lottie-android
- https://github.com/react-native-community/lottie-react-native/blob/master/docs/api.md
- https://airbnb.io/lottie/#/react-native
- http://airbnb.io/lottie/
- https://lottiefiles.com/
- https://cdnjs.com/libraries/bodymovin
- npm lottie-web
- npm react-lottie
- npm vue-lottie
- npm ng-lottie
Author
My name is Micheal Wayne and this is my blog.
I am a front-end software engineer.
Contact: michealwayne@163.com